6.8. Fallback Mechanism Example
Now we will cover fallback node operation. A fallback node is like an if-else statement, but since the if condition evaluation is performing an action, we call it a try-catch. A fallback node therefore has two parts: the try and the catch. Each part can contain one or more actions, however, unlike a Behavior Tree fallback node from the literature [60], our fallback node has only one try clause and the catch clause is just an action sequence of unlimited length.
We also support concurrent actions in the fallback node. To do this, we expand the try to contain the first concurrent action set. This could be one or more actions with the rule that they must execute together. If any action of the concurrent sequence fails, the try fails and the catch is executed once all try nodes are finished executing. Else, if the entire concurrent try set succeeds, the catch is skipped and the node after the fallback is next for execution.
Our fallback node does not currently support nesting, but supporting it would be a desirable improvement. Nesting try-catch blocks could increase behavior expressiveness. In general, it would be good to look through the most used mechanisms in programming language and think about how they could be included as runtime-editable behavior elements.
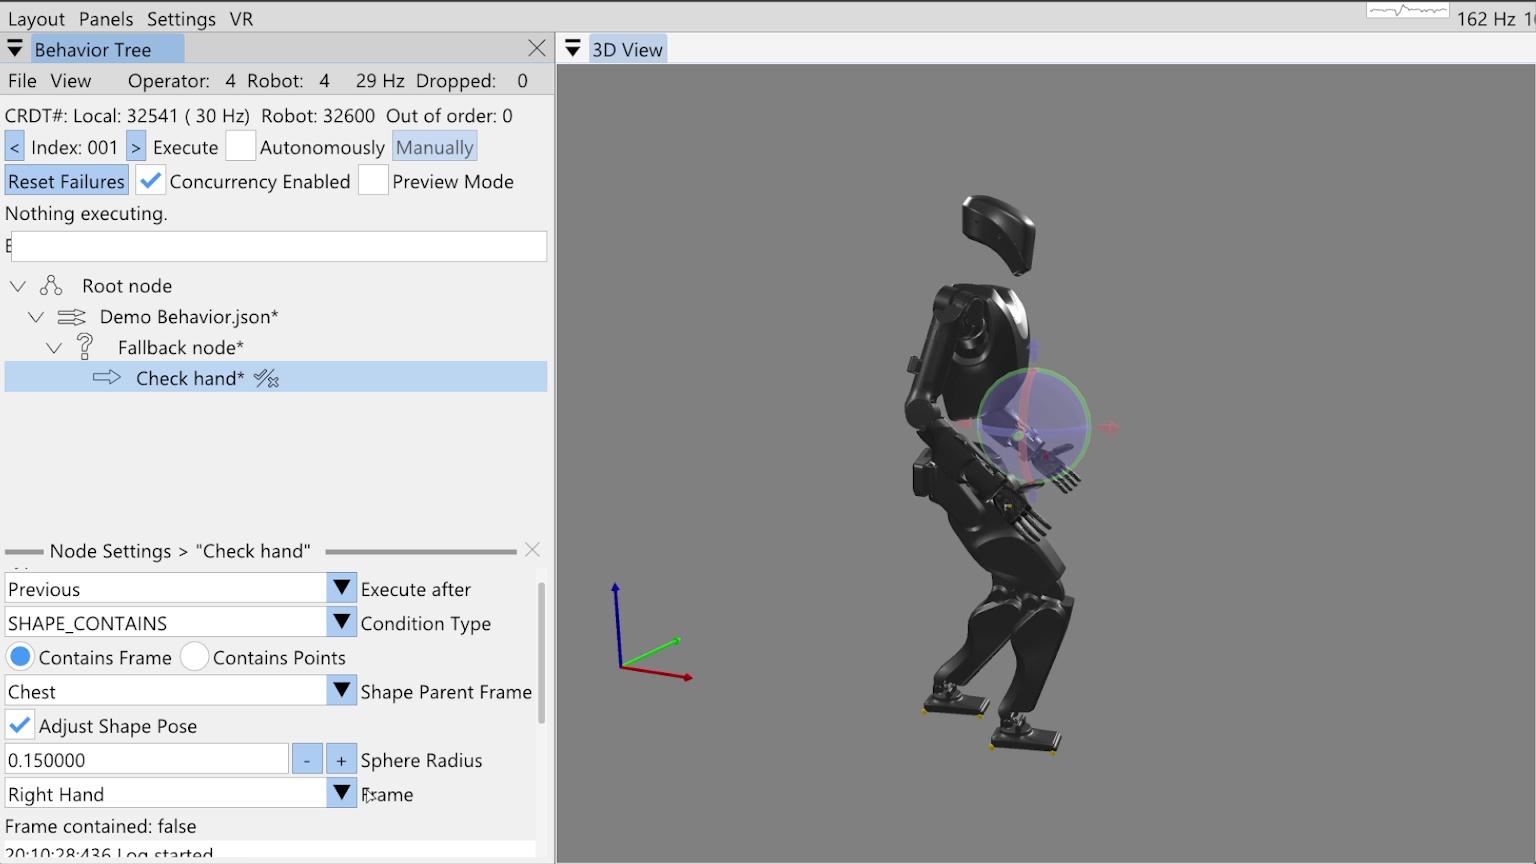
In Figure 6.29, we have started on a fallback example demonstration, where we have added a fallback node and a try node. In this demonstration, we want to check if the right hand is raised to a certain position and raise it if it isn’t. Once the hand is raised, we will yaw the spine. To check the hand position, we have added a “shape contains” condition node as the try action and named it “Check hand”.
6.8.1. Condition Nodes
We currently have six types of condition nodes: ALWAYS_FAIL, ALWAYS_SUCCEED, COUNTER, LLM, PROXIMITY, and SHAPE_CONTAINS.
A condition node is different from an action in that it does not directly perform an action, but instead is responsible for making a decision resulting in success or failure.
Success and failure for a condition node, however, have the same effect on behavior execution as actions: if the node succeeds, the behavior keeps going and, if the node fails, it halts execution by disabling autonomous mode.
The exception is that when a node fails in the try part of a fallback node, the behavior keeps going by executing the catch.
The “always succeed” and “always fail” condition node types are useful for testing and operation. The “always fail” node is especially useful if you want to test out a part of the behavior in autonomous mode but have it stop at a certain point. In this case, we’ll often add a temporary “always fail” condition node named “STOP”, as we did in Section 6.4.3.
The counter node maintains a persistent count and a tunable limit. Each time it is executed, the count is increased. If the count reaches the limit, the counter condition node fails.
The LLM condition node provides the ability to query a large language model to determine success or failure. It has an authorable system prompt, repeated prompt, and boolean response matcher. We covered the LLM node in more detail near Figure 4.46.
The proximity node checks the distance between two behavior reference frames. If the distance is between the tunable minimum and maximum, the condition succeeds. We also covered the proximity node in some more detail near Figure 4.50.
For this example, we’ll use the shape contains condition node to check that the right hand frame is within the bounds of a sphere. In Figure 6.29, our shape contains condition node is selected with the settings showing in the bottom-left. There are two modes for the shape contains condition: contains frame and contains points. We’ll be using contains frame in this example, but the contains points functionality, which counts the number of live point cloud points in the virtual shape, is covered near Figure 4.65.
6.8.2. Shape Contains Frame Condition
In Figure 6.29, you’ll see there are four main settings for the shape contains frame functionality. The shape parent frame, the shape pose, the sphere radius, and the frame to check containment of. We allow defining the shape’s pose with respect to any robot or object frame just like we do for actions. Checking the “Adjust Shape Pose” box enables the shape to be moved in the 3D view with a pose gizmo, as shown in the figure. Currently, just spheres are supported, but adding more types of shapes would be a good improvement.
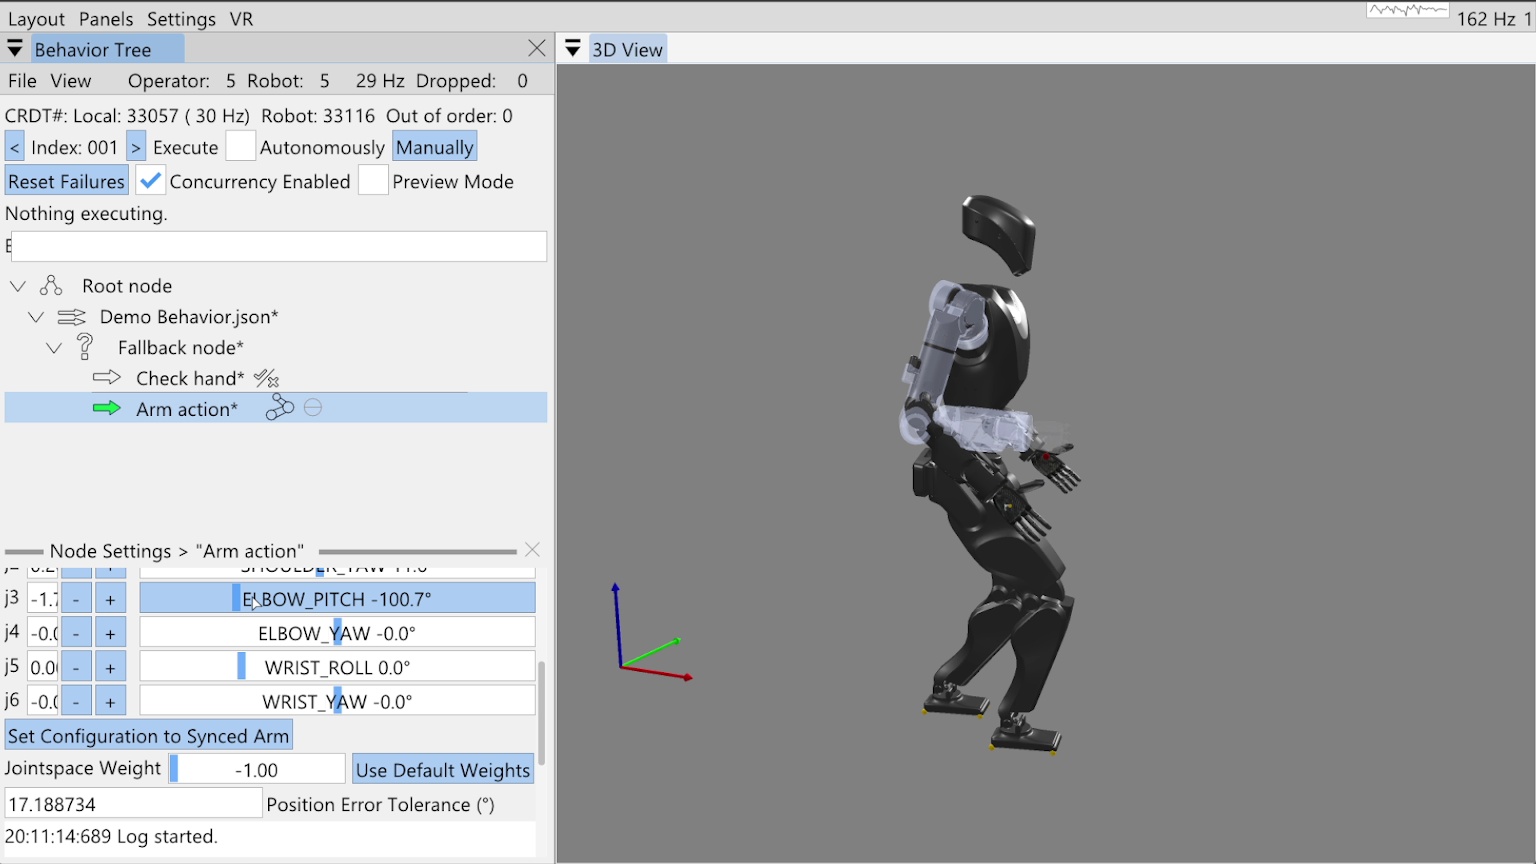
Pairing this condition node with our fallback gives us a mechanism to react to an unknown state, like where the hand is. To robustify our behavior and apply corrective action if the hand is not where we want it, we will now add an arm action to the fallback catch, as shown in Figure 6.30. When we add the catch action, because it is not concurrent with the condition in the try, we see a thin horizontal line in the tree editor. This line, between the “Check hand” and “Arm action” nodes, shows us where the try-catch delineation is.
6.8.3. The Goto Node

To show how you can implement while-loop-like behavior, we add a goto node after the arm action in the fallback catch, as shown in Figure 6.31. The goto node has a goto field that refers to another node by name. When the goto node is executed, the next execution index is set to that node. Here we have selected the “Fallback node” as the node to goto, which is a general way of saying to reexecute the try, as the “Fallback node” is a control node, not an action. When we point to control nodes, it’s effectively the same as pointing to the next action.
Since we want to be able to save this goto reference by name in the JSON, there is the possibility of ambiguity in the node’s name. To handle the case when there are multiple nodes of the same name in the tree, we search for the node to goto by proximity to the goto node. The closest matching node is chosen with levels of priority: children recursively come first, then siblings, then parents recursively. Our choice of priority is somewhat arbitrary. We recommend using unique node names where possible to avoid this ambiguity.
6.8.4. Reactive Fallback Demonstration
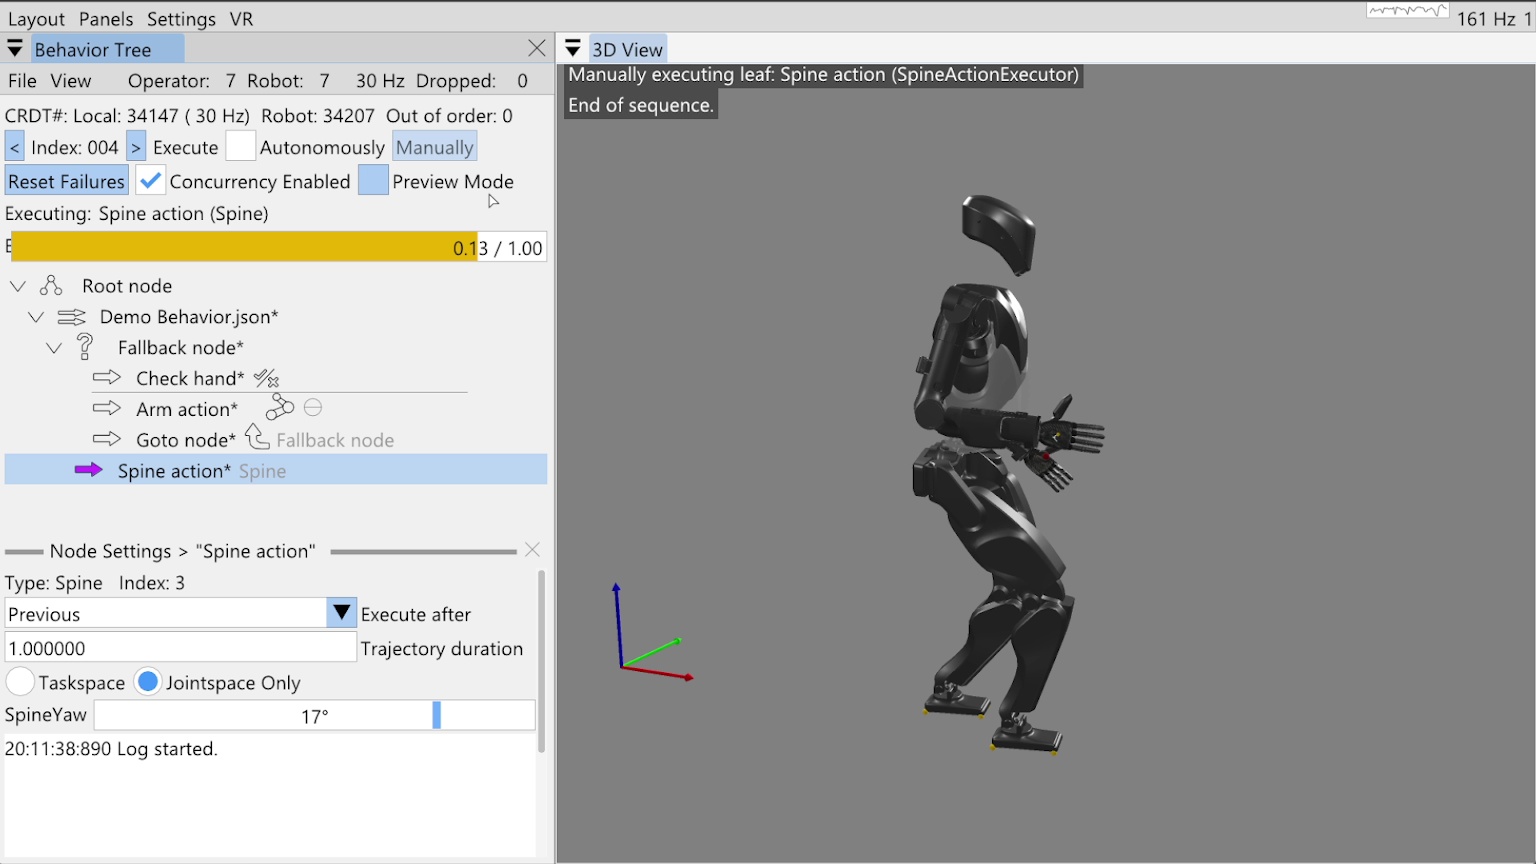
Finally, we add our spine action to turn the spine 17 degrees to the left as shown in Figure 6.32. Notice this node is not a child of the fallback node, but a sibling. We run through the behavior in the manual mode, inspecting the flow of execution. We run check hand, it fails, then the arm action runs to move the hand into the correct location. The goto node causes us to re-evaluate the check, which now succeeds, sending us on to the spine action, which executes successfully.
References cited on this page
[60] M. Colledanchise and P. “Ogren, Behavior trees in robotics and AI: An introduction. CRC Press, Taylor; Francis Group, 2018. doi: 10.1201/9780429489105.