6.7. Door Traversal Footstep Plan Example
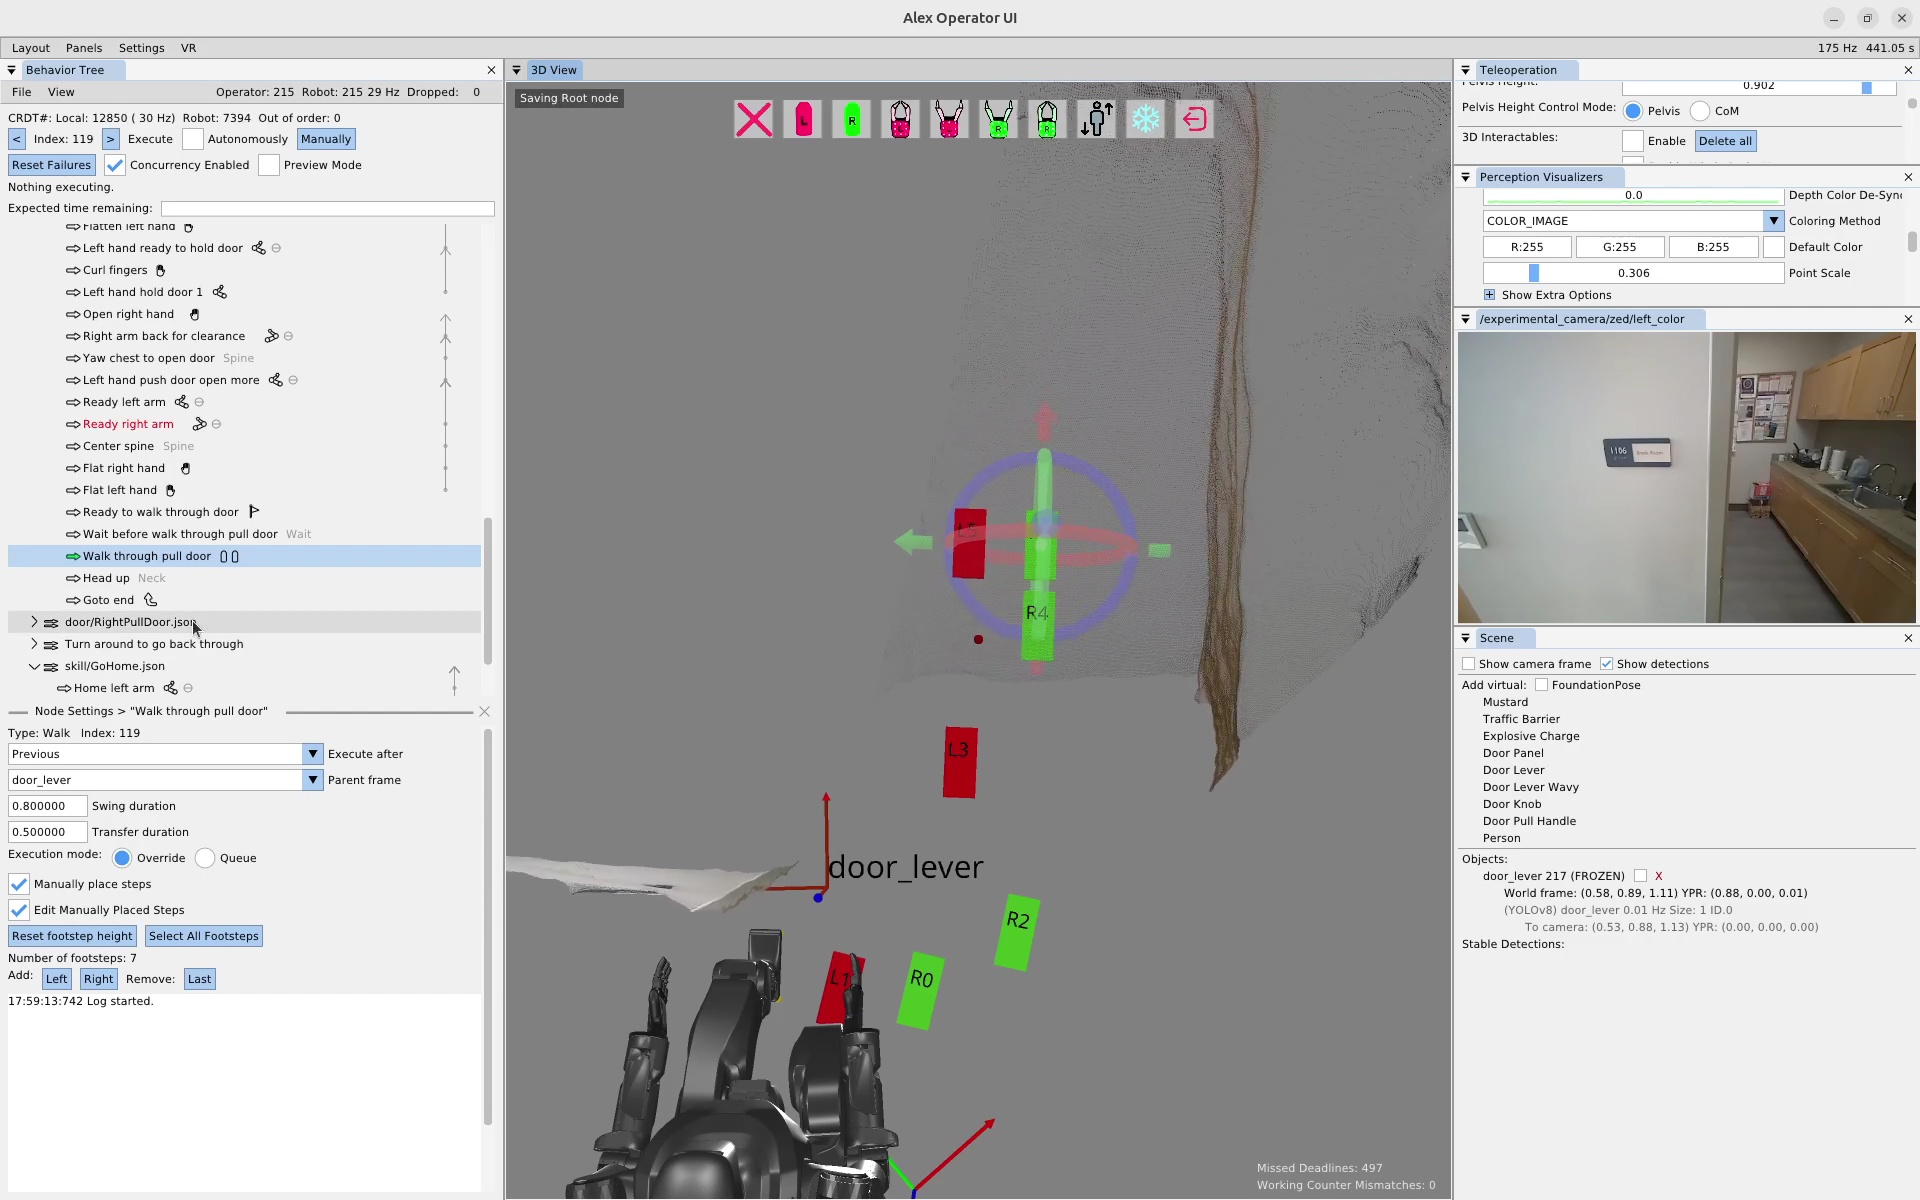
In this section we’ll recount an online, real robot session where we re-authored a set of door traversal footsteps. In Figure 6.26, the robot is situated in front of a doorway and an existing footstep plan action is selected. At this point, we had tried executing this footstep plan a couple of times, but the robot fell on each attempt. Since this footstep plan was designed to be robust in the presence of a spring closer, it has an overly difficult side stepping sequence in the beginning. In this case, the door was open and didn’t have a spring closer, so in the interest of task success we decided to re-author an easier to execute footstep plan on the spot.
6.7.1. Manually Defining a Footstep Plan
In the walk action settings for the “Manually place steps” mode, there are several features that allow the operator to manage the footstep plan. To enter the editing mode, which makes the feet graphics selectable in the 3D view with gizmos, the “Edit Manually Placed Steps” box is checked. The settings area displays the current number of footsteps in the plan as a verification component and to be sure there isn’t one off the screen somewhere. On the next line, there are buttons to append a left or right footstep to the end of the plan. There is also a button to remove the last step of the plan. These editor features are simplistic but enough to get the job done.
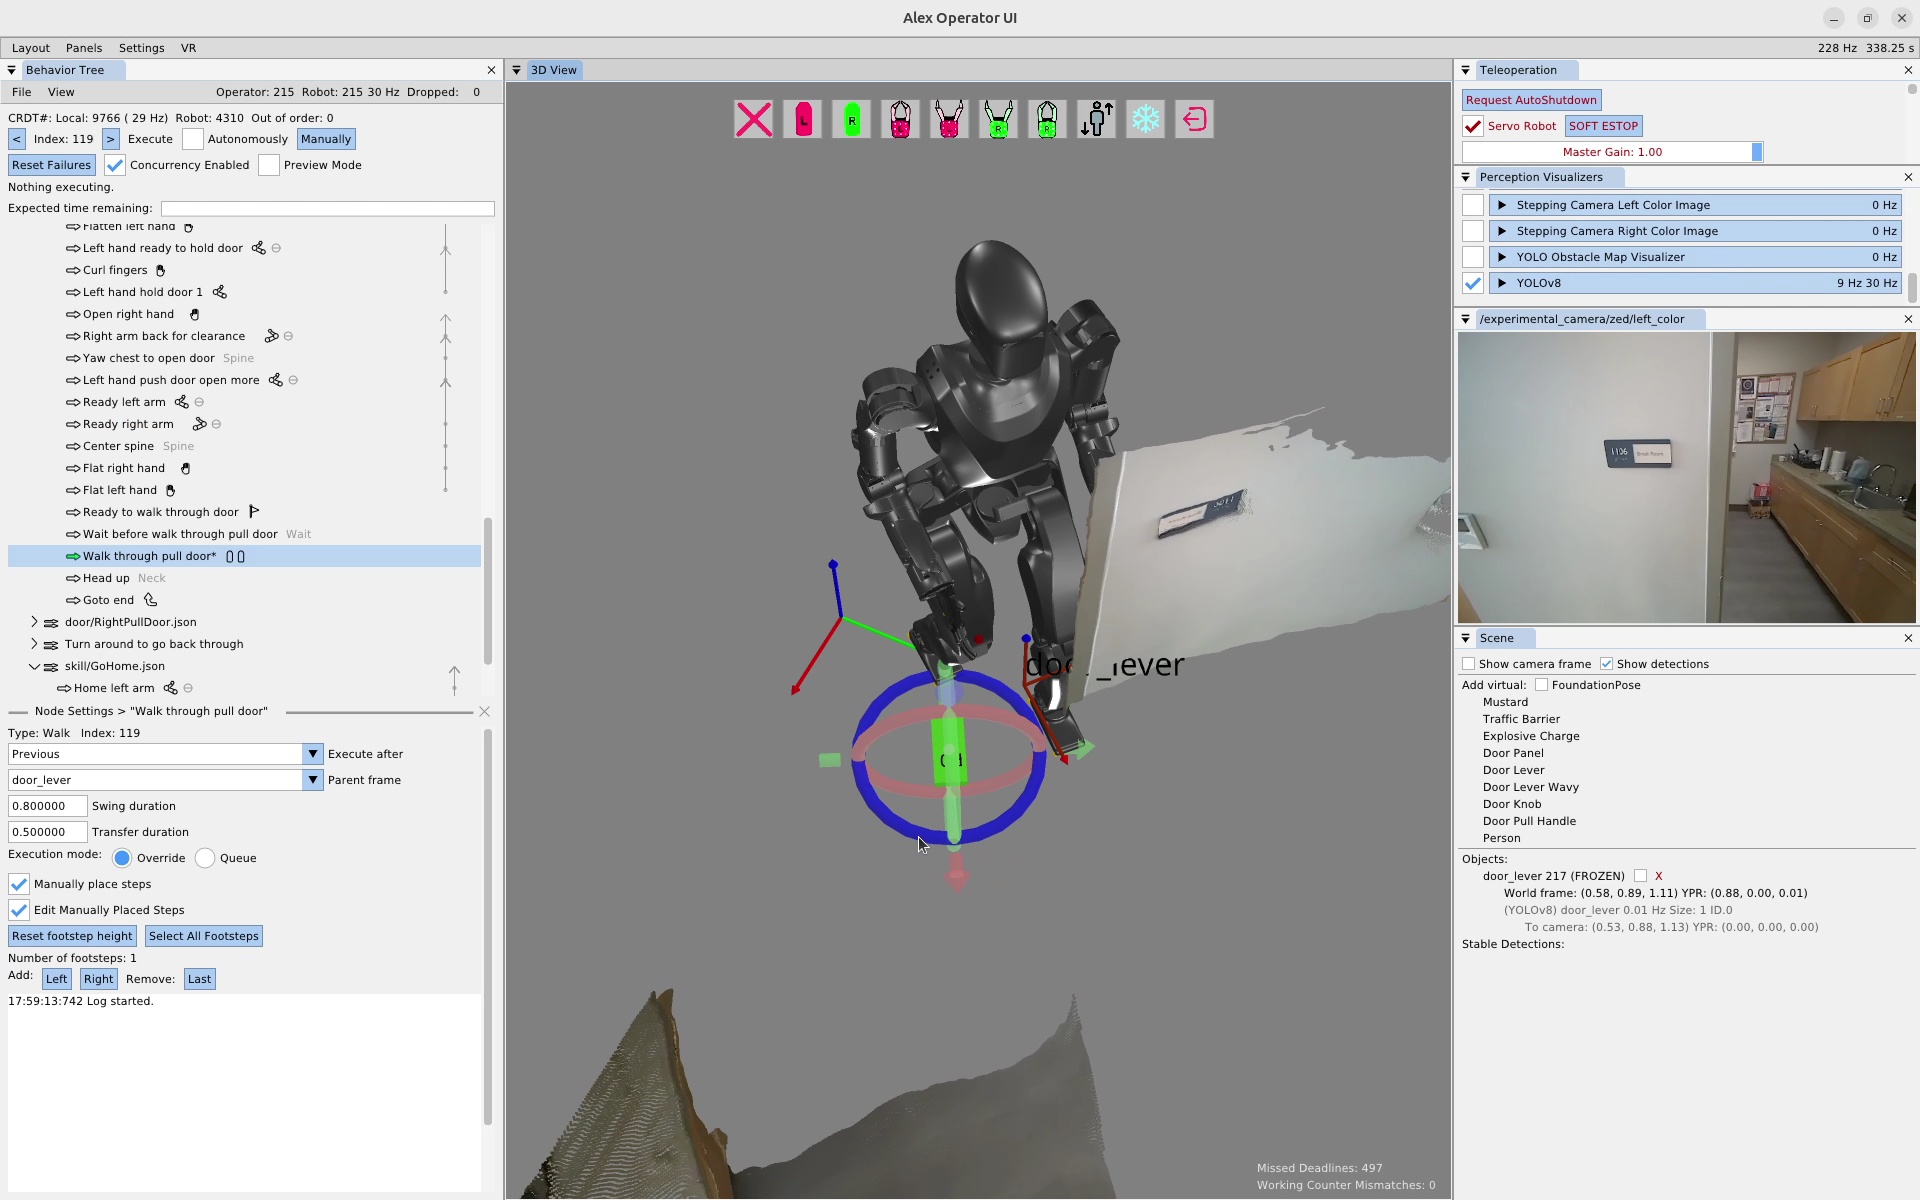
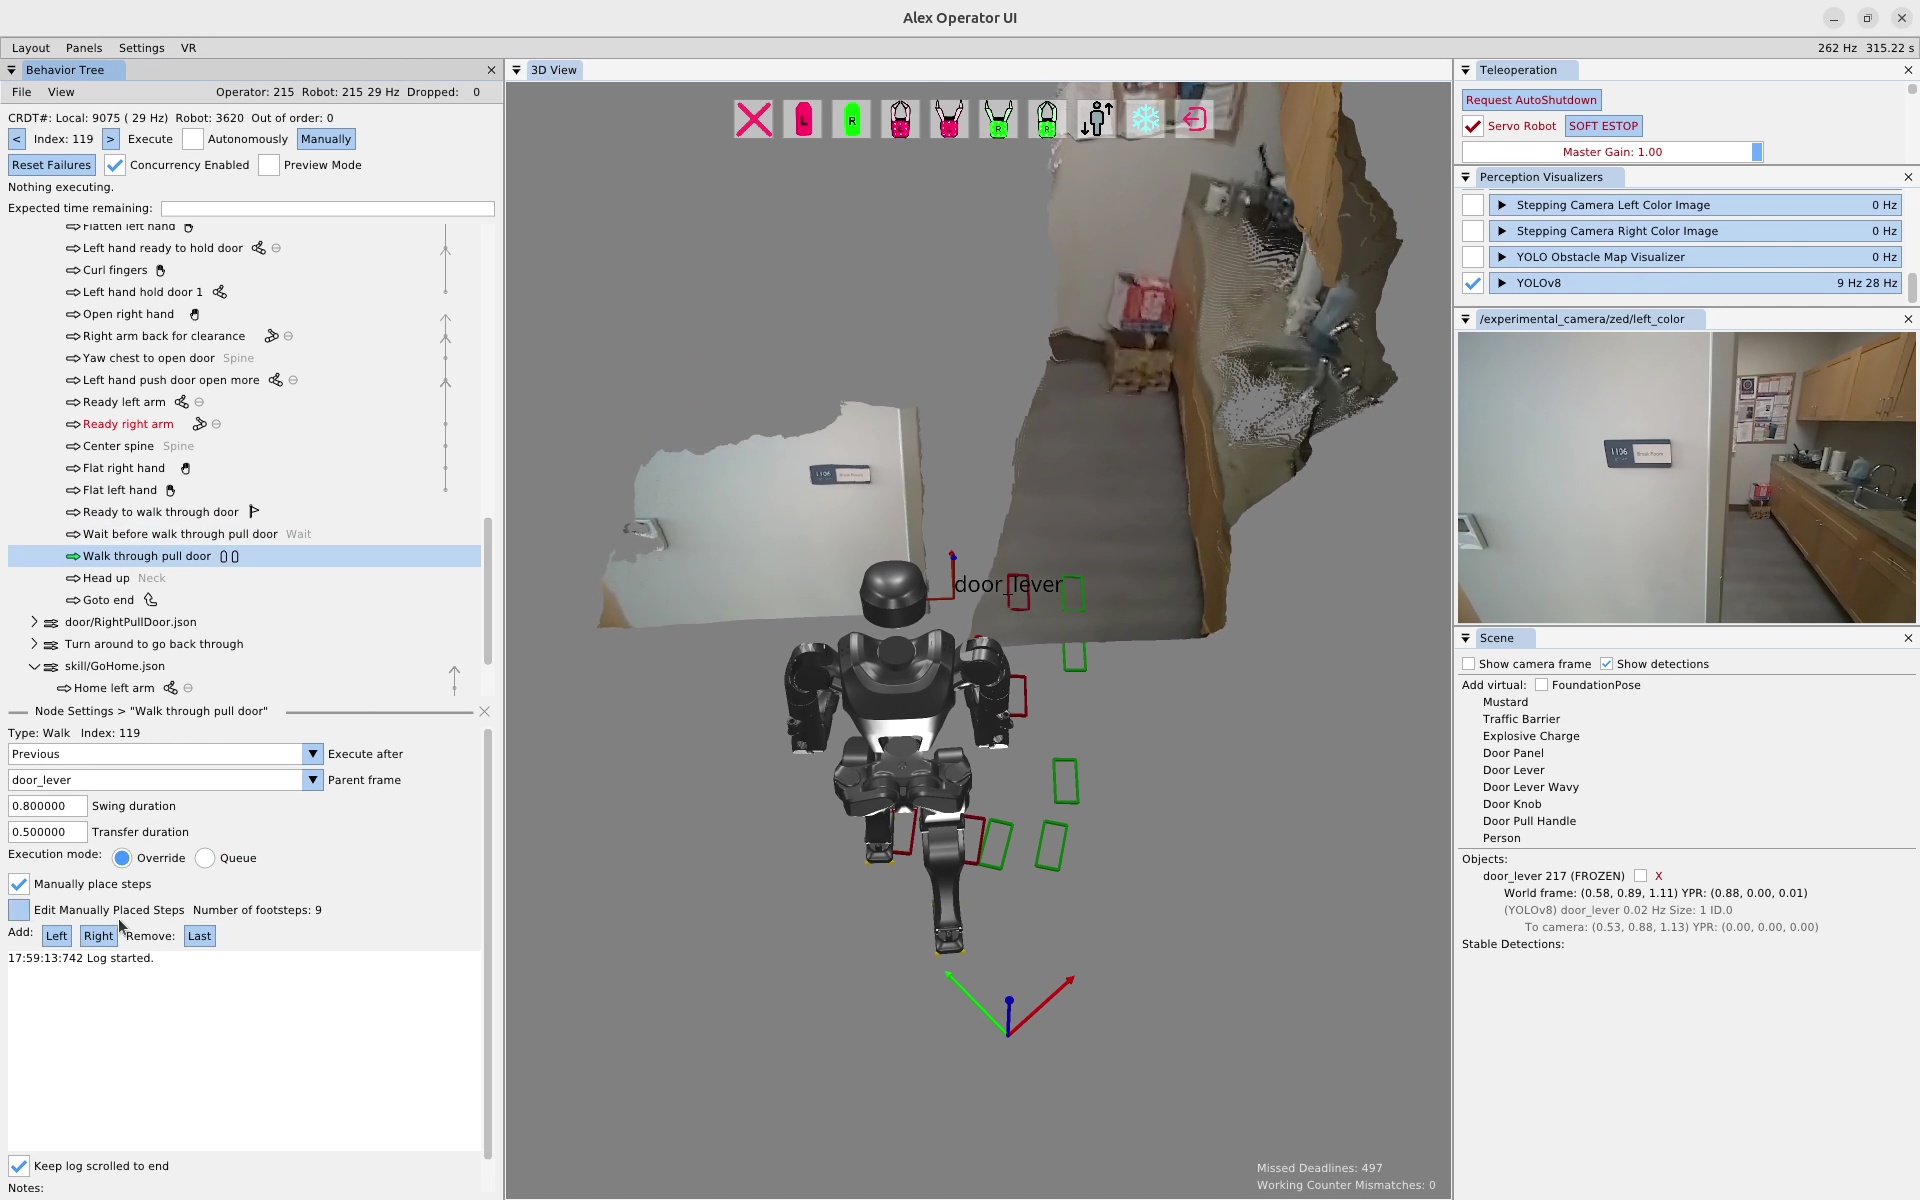
To clear the plan, we first click the remove last button a bunch of times until the plan is empty. Then, we click the “Right” button to add a right footstep to the plan. We click the footstep in the 3D view and move it to the desired location using the gizmo, as seen in Figure 6.27. This process is repeated until the plan is complete. The completed door traversal footstep plan can be seen in Figure 6.28. This plan took about 1 minute and 30 seconds to create.